原创文章,转载请注明: 转载自慢慢的回味
上一次,我们完成了搭建单节点Kubernetes环境。现在在其基础上用Gitlab构建CICD持续集成环境,并用一个Demo在服务网格Istio上面进行演示。
服务网格Istio安装
参照https://istio.io/latest/docs/setup/getting-started/完成Istio的安装:
export https_proxy=http://192.168.0.105:8070 export http_proxy=http://192.168.0.105:8070 curl -L https://istio.io/downloadIstio | sh - export https_proxy= export http_proxy= cd istio-1.12.1 export PATH=$PWD/bin:$PATH istioctl install --set profile=demo -y #✔ Istio core installed #✔ Istiod installed #✔ Egress gateways installed #✔ Ingress gateways installed #✔ Installation complete #Making this installation the default for injection and validation. # #Thank you for installing Istio 1.12. Please take a few minutes to tell us about your install/upgrade experience! https://forms.gle/FegQbc9UvePd4Z9z7 |
如下安装插件:
kubectl apply -f samples/addons kubectl rollout status deployment/kiali -n istio-system |
修改服务kiali为LoadBalancer类型:
kind: Service apiVersion: v1 metadata: name: kiali namespace: istio-system spec: type: LoadBalancer |
安装NFS Server
Gitlab需要存储卷,所有给Kubernetes集群提供一个NFS Server作为存储提供。
服务器端安装NFS Server:
sudo yum install nfs-utils -y sudo systemctl start nfs-server.service sudo systemctl enable nfs-server.service sudo systemctl status nfs-server.service sudo cat /proc/fs/nfsd/versions sudo mkdir /data chmod +w /data sudo mkdir -p /srv/nfs4/data sudo mount --bind /data /srv/nfs4/data sudo cp -p /etc/fstab /etc/fstab.bak$(date '+%Y%m%d%H%M%S') sudo echo "/data /srv/nfs4/data none bind 0 0" >> /etc/fstab sudo mount -a sudo echo "/srv/nfs4 192.168.0.0/24(rw,sync,no_subtree_check,crossmnt,fsid=0)" >> /etc/exports sudo echo "/srv/nfs4/data 192.168.0.0/24(rw,sync,no_subtree_check,no_root_squash)" >> /etc/exports sudo exportfs -ra sudo exportfs -v sudo systemctl restart nfs-server.service |
在客户端测试NFS Service:
sudo yum install nfs-utils -y sudo mkdir /root/data sudo mount -t nfs -o vers=4 192.168.0.180:/data /root/data cd /root/data echo "test nfs write" >> test.txt |
在客户端测试NFS Service:
export https_proxy=http://192.168.0.105:8070 export http_proxy=http://192.168.0.105:8070 wget https://get.helm.sh/helm-v3.7.2-linux-amd64.tar.gz export https_proxy= export http_proxy= tar -xvf helm-v3.7.2-linux-amd64.tar.gz cd /root/linux-amd64 export PATH=$PWD:$PATH helm repo add nfs-subdir-external-provisioner https://kubernetes-sigs.github.io/nfs-subdir-external-provisioner/ export https_proxy=http://192.168.0.105:8070 export http_proxy=http://192.168.0.105:8070 helm fetch nfs-subdir-external-provisioner/nfs-subdir-external-provisioner export https_proxy= export http_proxy= helm install nfs-subdir-external-provisioner nfs-subdir-external-provisioner-4.0.14.tgz \ --set nfs.server=192.168.0.180 \ --set nfs.path=/data |
编辑StorageClass nfs-client,加上storageclass.kubernetes.io/is-default-class: ‘true’,使其成为默认的存储提供者:
kind: StorageClass apiVersion: storage.k8s.io/v1 metadata: name: nfs-client annotations: storageclass.kubernetes.io/is-default-class: 'true' |
构建CICD持续集成环境
安装 Gitlab
安装gitlab到kubernetes环境中:
注意上一篇文章中给Docker配置代理相当重要。
helm repo add gitlab http://charts.gitlab.io/ helm repo update kubectl create namespace mygitlab helm upgrade --install my-gitlab gitlab/gitlab --version 5.6.0 --namespace mygitlab --set global.hosts.https=false --set global.ingress.tls.enabled=false --set global.ingress.configureCertmanager=false --set global.kas.enabled=true --set global.edition=ce |
配置本地域名
查询ingress的外网地址如192.168.0.192:
[root@k8s-master data]# kubectl get ingress --all-namespaces NAMESPACE NAME CLASS HOSTS ADDRESS PORTS AGE mygitlab my-gitlab-kas my-gitlab-nginx kas.example.com 192.168.0.192 80 44m mygitlab my-gitlab-minio my-gitlab-nginx minio.example.com 192.168.0.192 80 44m mygitlab my-gitlab-registry my-gitlab-nginx registry.example.com 192.168.0.192 80 44m mygitlab my-gitlab-webservice-default my-gitlab-nginx gitlab.example.com 192.168.0.192 80 44m |
添加自定义host到hosts中:
vi /etc/hosts 192.168.0.192 minio.example.com 192.168.0.192 registry.example.com 192.168.0.192 gitlab.example.com 192.168.0.192 kas.example.com |
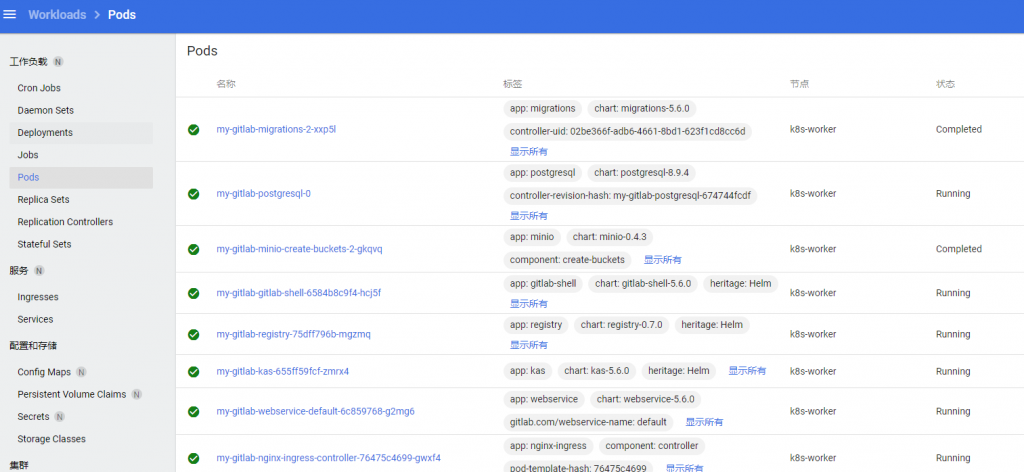
接下来需要修改coredns ConfigMap,使集群内部的DNS能够连上gitlab。注意IP地址192.168.0.192需要修改成你自己gitlab LoadBalancer地址。
否则,比如my-gitlab-gitlab-runner-*-*连不上gitlab.example.com。
kind: ConfigMap apiVersion: v1 metadata: name: coredns namespace: kube-system data: Corefile: | .:53 { errors ...... hosts { 192.168.0.192 minio.example.com 192.168.0.192 registry.example.com 192.168.0.192 gitlab.example.com fallthrough } ...... } |
修复Docker的代理设置,注意包括master和worker节点
给Docker追加-H tcp://0.0.0.0:2375使my-gitlab-gitlab-runner-*-*可以调用Docker:
vi /usr/lib/systemd/system/docker.service ExecStart=/usr/bin/dockerd -H fd:// --containerd=/run/containerd/containerd.sock -H tcp://0.0.0.0:2375 |
确保http-proxy.conf含有NO_PROXY=example.com
vi /etc/systemd/system/docker.service.d/http-proxy.conf [Service] Environment="HTTP_PROXY=http://192.168.0.105:8070" Environment="HTTPS_PROXY=http://192.168.0.105:8070" Environment="NO_PROXY=localhost,127.0.0.1,example.com" |
修改daemon.json,增加”insecure-registries”: [“registry.example.com”]:
vi /etc/docker/daemon.json { "exec-opts": ["native.cgroupdriver=systemd"], "log-driver": "json-file", "log-opts": { "max-size": "100m" }, "storage-driver": "overlay2", "insecure-registries": ["registry.example.com"] } systemctl daemon-reload systemctl restart docker |
设置gitlab-runner可以访问非https的块存储器
接下来需要修改my-gitlab-gitlab-runner ConfigMap,把Insecure = false改成Insecure = true。
kind: ConfigMap apiVersion: v1 metadata: name: my-gitlab-gitlab-runner namespace: mygitlab data: config.template.toml: | [[runners]] [runners.cache] [runners.cache.s3] ServerAddress = "minio.example.com" BucketName = "runner-cache" BucketLocation = "us-east-1" Insecure = true |
确保gitlab-runner工作正常
重启my-gitlab-gitlab-runner-*-*,然后查看my-gitlab-gitlab-runner-*-*的日志,确保Registering runner… succeeded就成功了:
ERROR: Registering runner... failed runner=CiOHA0SP status=couldn't execute POST against http://gitlab.example.com/api/v4/runners: Post http://gitlab.example.com/api/v4/runners: dial tcp: lookup gitlab.example.com on 10.96.0.10:53: no such host PANIC: Failed to register the runner. You may be having network problems. Registration attempt 6 of 30 Runtime platform arch=amd64 os=linux pid=82 revision=5316d4ac version=14.6.0 WARNING: Running in user-mode. WARNING: The user-mode requires you to manually start builds processing: WARNING: $ gitlab-runner run WARNING: Use sudo for system-mode: WARNING: $ sudo gitlab-runner... Registering runner... succeeded runner=CiOHA0SP |
登录gitlab,修改密码,上传SSH Public Key
通过下列命令获取GITLAB root用户密码后登录http://gitlab.example.com/users/sign_in:
kubectl get secret my-gitlab-gitlab-initial-root-password -n mygitlab -o jsonpath='{.data.password}' | base64 --decode |
通过下列命令生成GITLAB root用户的SSH KEY,并把id_rsa.pub 内容更新到http://gitlab.example.com/-/profile/keys,这样就可以用git了:
[root@k8s-master k8s]# ssh-keygen -t rsa -b 2048 -C "mygitlab" [root@k8s-master k8s]# cat /root/.ssh/id_rsa.pub ssh-rsa AAAAB3NzaC1yc2EAAAADAQABAAABAQC+tr8cgRitUKHzoIReyPYYsoywtCvn8TLFMC2BjyI3kKWia4zajWkOFQpJwe9eaSlwO3GkqVdpfZ34O+y0caUWfwaw1+inZIlRvx7X6yGmMha27VSmfzj6dfd6TzH2B5KaBUg21nFBYaXaYwLAT0jX8BQ+/QXl8gi33NmH06ctIdVPl9dBkNBvr9rzRMYQnoFtJppKHnN8S/9XnhEJFN3lEvajka+j5VgeOuzLNUs7NvWd9+cbSWNakJulOSK/WSUdzT2oWpY6YP+amAByOIa5Nl2XSRpZ2/oVWG0KsXBHSgwhIlu6WK5GzTVSxRRdQNjSyqNTeuPmsh6WC1alWPGl mygitlab |
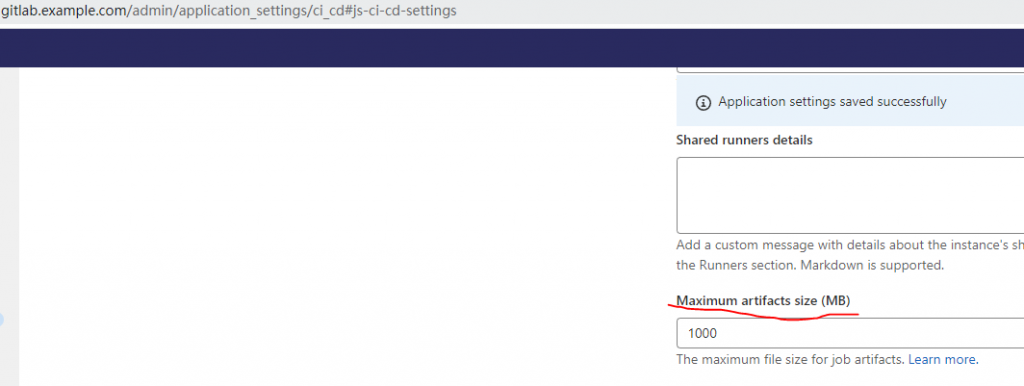
修改允许上传Jar的最大限制
发布服务网格Demo程序
创建命名空间并注入Istio
在Kubernetes下创建namespace bookstore-servicemesh
kubectl create namespace bookstore-servicemesh kubectl label namespace bookstore-servicemesh istio-injection=enabled |
绑定ServiceAccount使其具有集群管理权限,后面helm会用:
kind: ClusterRoleBinding apiVersion: rbac.authorization.k8s.io/v1 metadata: name: mygitlab-admin-role-default subjects: - kind: ServiceAccount name: default namespace: mygitlab roleRef: apiGroup: rbac.authorization.k8s.io kind: ClusterRole name: cluster-admin |
CICD过程
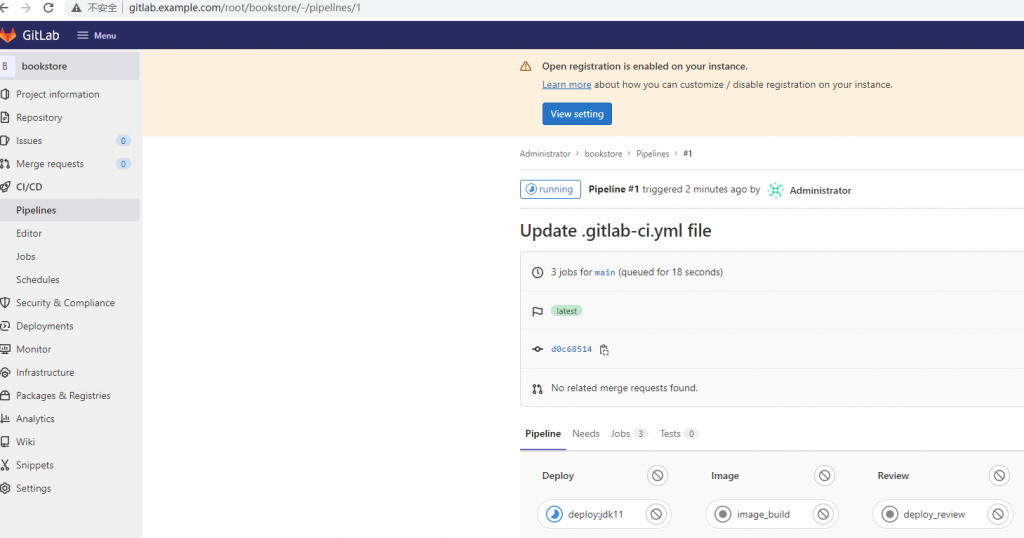
下载源码bookstore(修改自https://github.com/fenixsoft/servicemesh_arch_istio.git),解压后直接Push到git@gitlab.example.com:root/bookstore.git。

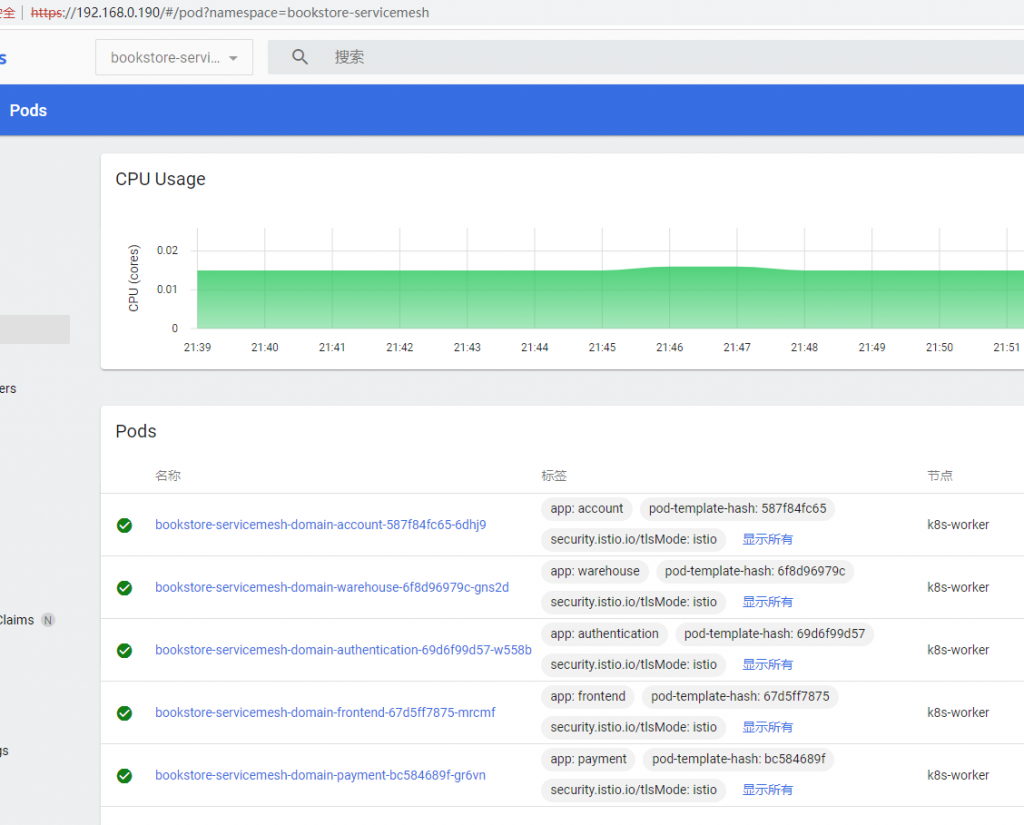
等待gitlab CICD,然后在namespace bookstore-servicemesh下会自动Build and Deploy。
使book-admin具有pull 私有hub的权限
在namespace bookstore-servicemesh下创建一个私有Docker hub registry.example.com的 pull secret:
kubectl create secret docker-registry docker-gitlab --docker-server=registry.example.com --docker-username=root --docker-password=yougitlabpassword -n bookstore-servicemesh |
关联这个secret到ServiceAccount book-admin。
kind: ServiceAccount apiVersion: v1 metadata: name: book-admin namespace: bookstore-servicemesh ...... imagePullSecrets: - name: docker-gitlab |
测试
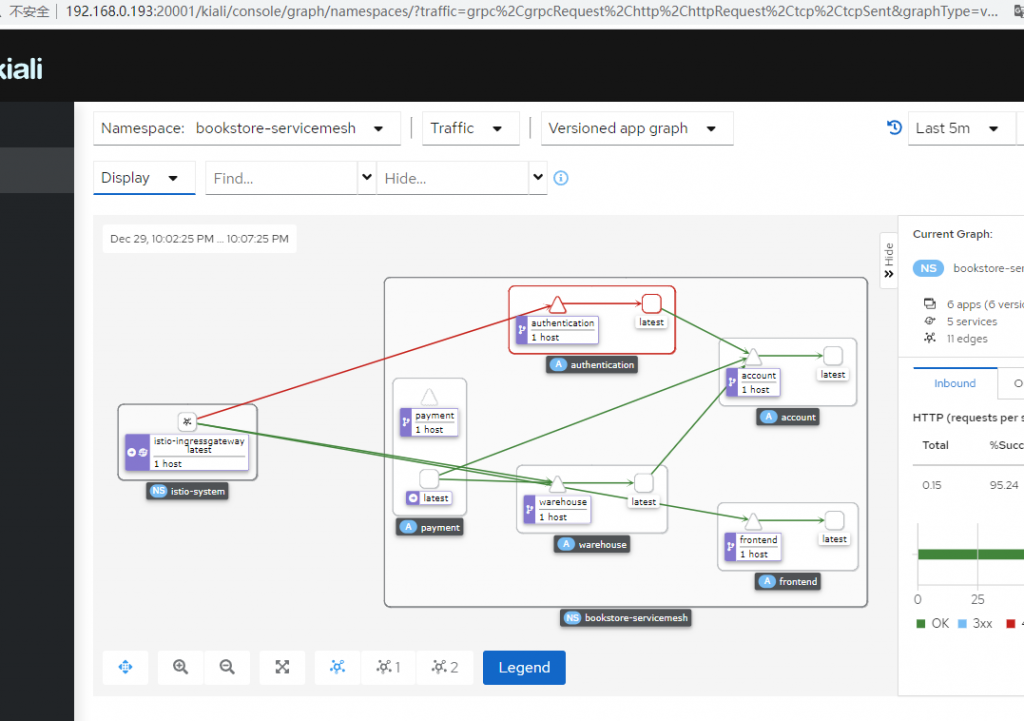
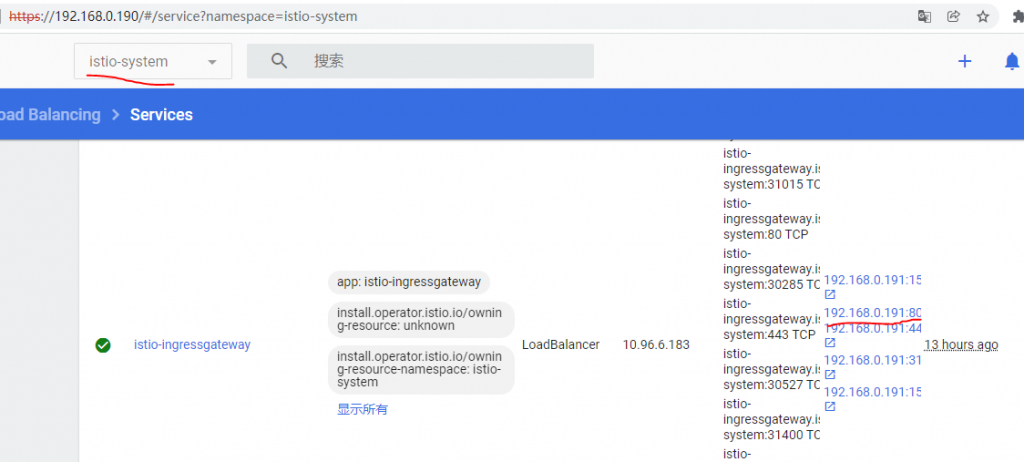
从如下图示可以得到Istio的Ingress地址:
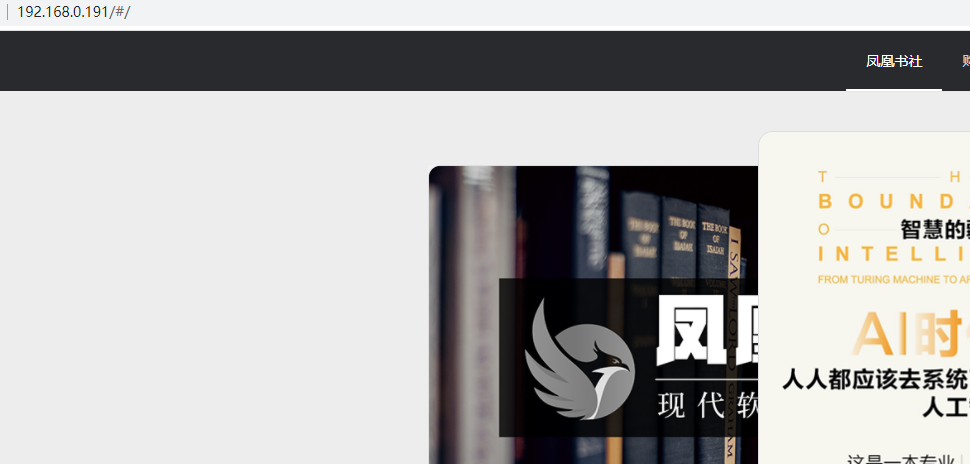
访问如下:
本作品采用知识共享署名 4.0 国际许可协议进行许可。

